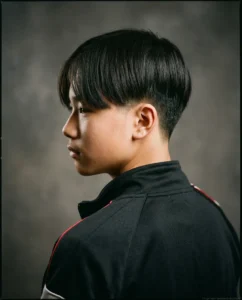
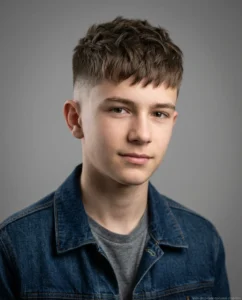
Thin hair is often said to rule out a fringe. It doesn’t, not if the length and the fade are handled right. A medium fringe hides thinning better than almost any other cut on this list, mostly because it adds visual density right where your eye lands first.
1. Textured Crop Fringe

A textured crop keeps the fringe short, somewhere around 1 to 1.5 inches, and cut with a razor or point-cutting shears so each strand catches light differently. That texture is what does the heavy lifting on thin hair — a smooth, uniform fringe shows scalp underneath, a choppy one doesn’t. Matte clay works better here than wax, since wax weighs down fine strands and flattens the whole effect within an hour.
Q: How much product does a crop fringe actually need?
A: A dime-sized amount of matte clay, worked in while the hair is about 80% dry. Any more than that and thin strands start clumping instead of separating.
Barbers trim this one every 3 to 4 weeks, tighter than most cuts on this list, because thin hair grows soft at the edges and loses its shape fast. Skip a session past week 5 and the fringe stops looking cropped. It starts looking like it’s just growing out.
2. Curtain Fringe

Curtain fringes part down the middle and sweep to both sides, which sounds like the opposite of what thin hair needs. But the part itself creates a visible root lift that a full-forward fringe can’t fake. Length usually sits between the eyebrow and cheekbone. Blow-dry with a round brush pointed away from the part to keep that lift instead of letting it collapse flat by noon.
Q: Does a curtain fringe work with a receding hairline?
A: Better than most guys assume, actually. The center part draws attention away from the temples, which is exactly where thinning shows up first.
The trade-off is upkeep. This style needs a light hold spray daily, or it drifts back to whatever direction your hair naturally falls. Not a wash-and-go cut, and anyone who tells you otherwise hasn’t tried it past week two.
3. Side-Swept Fringe with Skin Fade

Pairing a side-swept fringe with a skin fade does something clever for thin hair: the bare skin at the sides makes the hair on top read as thicker by comparison. The fringe sweeps at roughly a 45-degree angle across the forehead, cut just long enough to hold that direction without a blast of hairspray every hour.
Q: Which face shapes handle the side sweep best?
A: Round and square faces, mostly, since the diagonal line breaks up width. Oval faces can wear it too, though the fade makes less of a visual difference there.
Fade lines need a barber visit every 2 weeks to stay sharp. Longer than that and the contrast that makes this cut work starts to blur into an awkward grown-out patch.
4. Fringe Quiff

A quiff pushes the fringe up and back instead of forward, which sounds risky for thin hair until you see it done. The lift at the front is exactly the kind of volume illusion fine hair actually needs. Blow-dry against the direction you want first, then finish going the opposite way with a boar-bristle brush.
Q: Will a quiff hold up through a full workday?
A: With a strong-hold cream, yes — about 8 to 10 hours before it needs a touch-up. Without it, expect the front section to drop by early afternoon.
This is not a low-maintenance option. Expect a blow dryer and a comb in the daily routine, and expect the honest truth that holding a quiff shape on thin hair is more about technique than product.
5. Fringe with Low Taper Fade

A low taper keeps the fade close to the neckline instead of climbing up the sides, which reads as a quieter, more office-friendly version of a fringe cut. Fringe length stays around 2 inches here, long enough to style forward without looking severe against the tapered sides.
Q: Is this the easiest fringe style to grow out?
A: Yes, more than the skin fade version. The low taper blends gradually, so an extra 3 weeks past a trim still looks intentional instead of patchy.
Thin hair holds this shape best with a lightweight sea-salt spray rather than clay. Clay on a longer fringe length tends to separate strands into visible clumps instead of one clean sweep.
6. Wispy Fringe with Undercut

An undercut trims the sides down to almost nothing, and the fringe on top is left longer and slightly disconnected on purpose — wispy, not blunt. That disconnect sells the illusion of density, since the eye reads the gap as intentional styling rather than thin coverage.
Q: Does the undercut grow out badly?
A: It’s rougher than a fade, honestly. Undercuts need a clipper touch-up every 10 to 14 days, or the sides start looking uneven instead of sharp.
Worth it if you want maximum contrast between top and sides. Skip it if you’re not willing to keep up with the schedule — it stops looking sharp fast past the two-week mark.
7. Blunt Micro-Fringe

A blunt micro-fringe sits high, usually just above the eyebrows, and gets cut straight across instead of textured. It’s the boldest option on this list, and not for every face. On thin hair, though, it hides more scalp per square inch than any other fringe style here, purely because of how short and dense the cut line sits.
Q: Is a blunt fringe hard to maintain at home?
A: Between barber visits, mostly no — a light pomade and a fine-tooth comb keep the line straight. The cut itself needs a barber every 3 weeks, since even a little growth ruins the blunt edge.
The honest answer is this style draws attention, more than any other one here. Good if that’s the point. Skip it if you’d rather ease into a fringe than commit to one immediately.